There are two methods with which to access EKMD H: and P: drives from home. Both methods require an active VPN connection.
Method A -https: //mydesktop.huji.ac.il no software installation
This is the easier method since it requires no software installation. It does have however two downsides. You can access the files and edit them on the virtual machine but cannot share the files with your local computer, and screen resolution is sometimes problematic.
Connection Instructions:
1) Connect to Rumba VPN (without client installation) or Samba VPN
2) Go to the website https://mydesktop.huji.ac.il. If the following window appears, select HTML Access

3) Authenticate using your EKMD username and password. Change to EKMD in the third field.

4) Choose a Farm and wait a few minutes for your connection. It takes time for the desktop to appear, so please be patient.
You will find a shortcut to your H drive on the desktop.

Use File Explorer to locate drive P:

Method B https://mydesktop.huji.ac.il with software installation
Advantage: You can access the files and edit them on the virtual machine, upload new files and transfer from H to P.
This is a more stable method and allows files to be transferred to and from the local computer, but requires software installation and one-time execution of several settings.
Connection Instructions:
1) Connect to Samba VPN
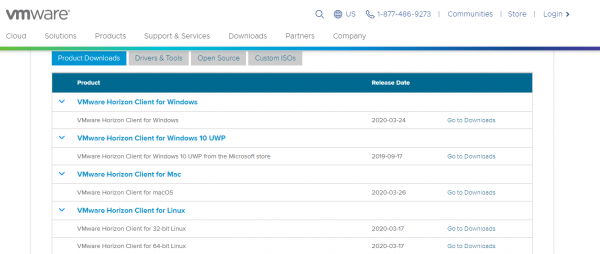
2) Go to the website https://mydesktop.huji.ac.il and choose Install VMare Horizon Client.

3. Select the appropriate operating system (first option - Windows 10)
4. Download the file.
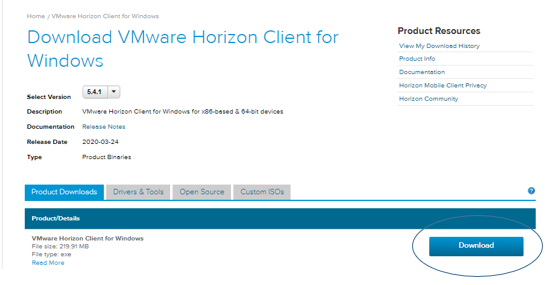
5. Open the file you downloaded file and install. When the installation is complete, you will be prompted to reboot the computer. This is requred.
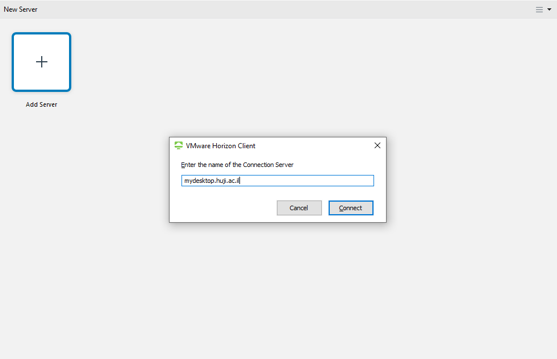
6. Reconnect to Samba, and open the installed software, VMware Horizon Client
7. Press the + and add a new server with the address mydesktop.huji.ac.il and press CONNECT
8. You will be asked to enter an EKMD username and password and EKMD server.
9. You will see the icons of computers that you can connect to. You can choose any option.

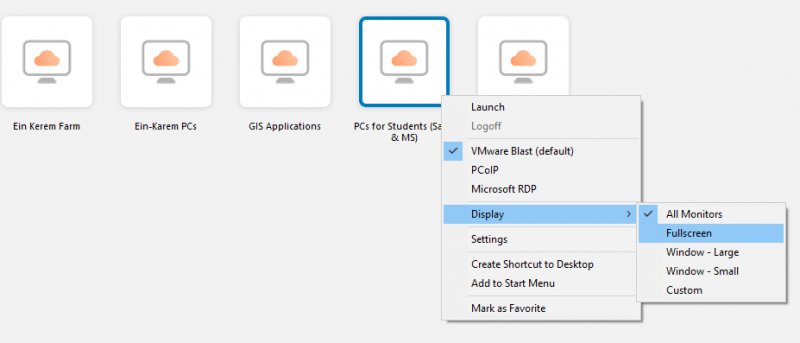
10. To adjust the display of the remote computer to your computer, right-click on the computer, click on the DISPLAY option and select FULLSCREEN
11. Double-click on the desired computer. Entering the computer will take another minute or two so please be patient/
In the sharing dialog box confirm

12. If you get a message about the license or another error message just ignore everything is fine.
You can access the H and P drives on the remote computer via This PC icon.


13. The local drives you choose to share will appear as network locations Z:, Y: or X:
Setting up local shared folders is done only once. You can always remove the sharing or add sharing of other folders by selecting the gear of the service (or clicking on options at the top of the screen after entering the remote computer):

Click on Sharing

Once the drives are approved they will appear in File Explorer.
14.. When finished working, disconnect by right-clicking on Start, and selecting LOGOFF
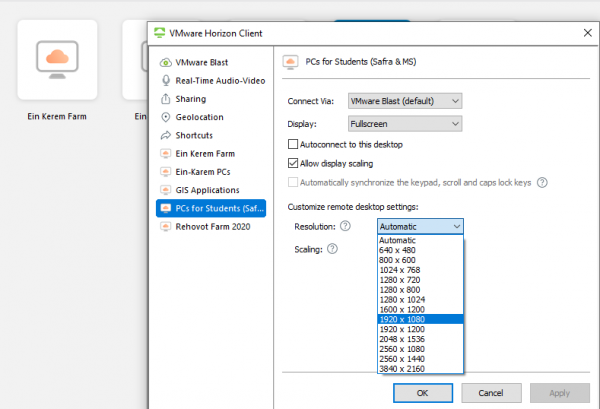
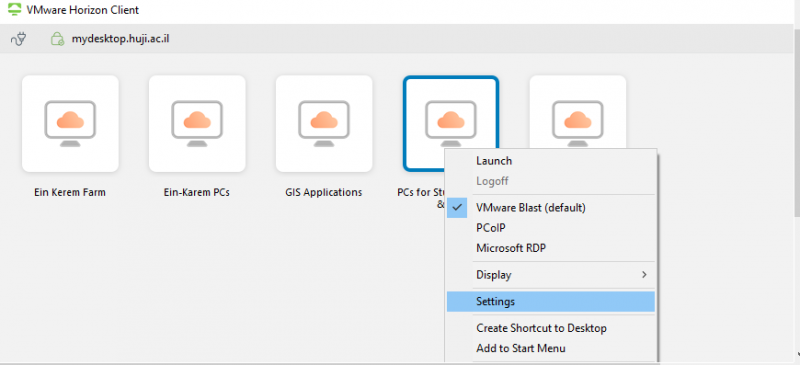
If you still have problems with the system resolution, right-click on the desired computer
And select SETTINGS
Choose the resolution that is appropriate for your computer