General instructions for scanning with the standard scanner
-
Open a scan program by double-clicking the icon on the desktop:
 or by pressing the SCAN button on the scanner itself.
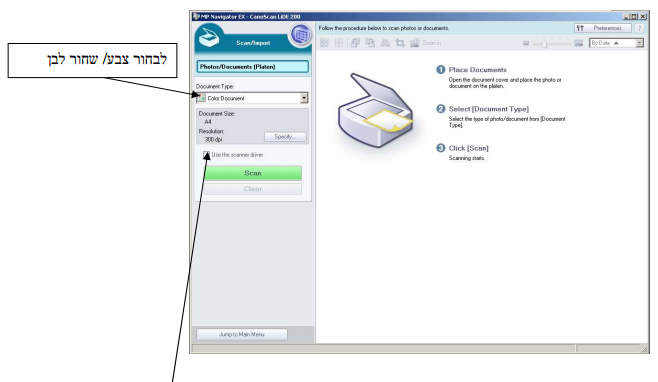
- Select SCAN / IMPORT.
- Select PHOTOS / DOCUMENTS.

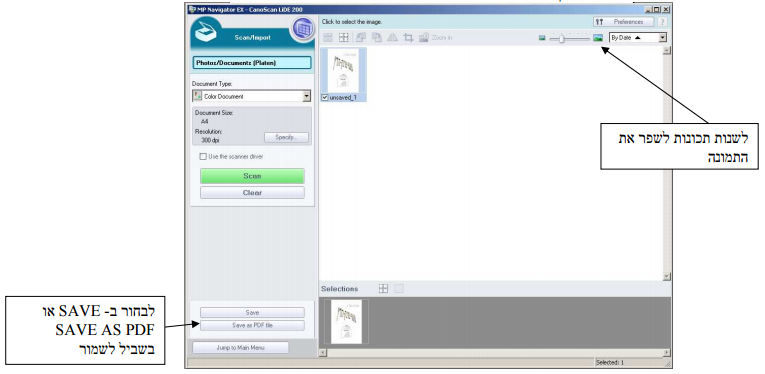
4. Select SCAN. For advanced options, select Use the scanner driver
5. After the scan appears:

General instructions for scanning in the feeder scanner
- All pages to be scanned should be placed inside the scanner, facing down, without pins.
- Select the function number using the arrow buttons on the scanner. The following is a list of functions:
- Scan to PDF in automatic, double-sided detection.
- Scan to PDF in black and white, double-sided.
- Scan to PDF in gray, double-sided.
- Scan to PDF in color, double-sided.
- Scan to PDF in black and white, one-sided.
- Scan to PDF in gray, single-sided.
- Scan to PDF in color, one-sided.
- Scan to JPEG in color, one-sided.
- Scan to PDF with OCR (English text recognition).
3. Press SCAN on the scanner to perform the scan (in initial activation moth click once more).
I scanned, where are my photos?
The default of the scanning software is to save the images on the desktop. If you want to save the image files, you need to transfer them to your personal drive or to portable media, because files that are on the desktop are deleted after restarting the computer.
How to reduce the size of an image?
If you received an image with too high a resolution, you can use the XnView software that appears in the application window. Now after opening an image in the software, you can reach the resize menu by pressing Shift + S. When saving the image, you should change to jpg type. And save in order to significantly reduce the file size.

